There are few 2002s out there that have not suffered from door lock problems. The problems usually start with gradually increasing effort to turn the key in the lock and usually end when half of the lock cylinder comes out with the key!
While a lack of lubrication is often a part of the problem, the usual cause is a deterioration of the alignment between the door latch mechanism and the lock cylinder itself. This misalignment results in mechanical binding that no amount of lubrication will help. The increased force exerted on the cylinder will usually end up destroying it.
Fortunately, the fix is relatively simple and is described below, along with how to re-key a replacement cylinder to match your original if the worst has already happened. The notes on disassembly of the lock are also useful if you wish to clean and lube the lock cylinder and button - they could probably use it.
Unsticking the Mechanism
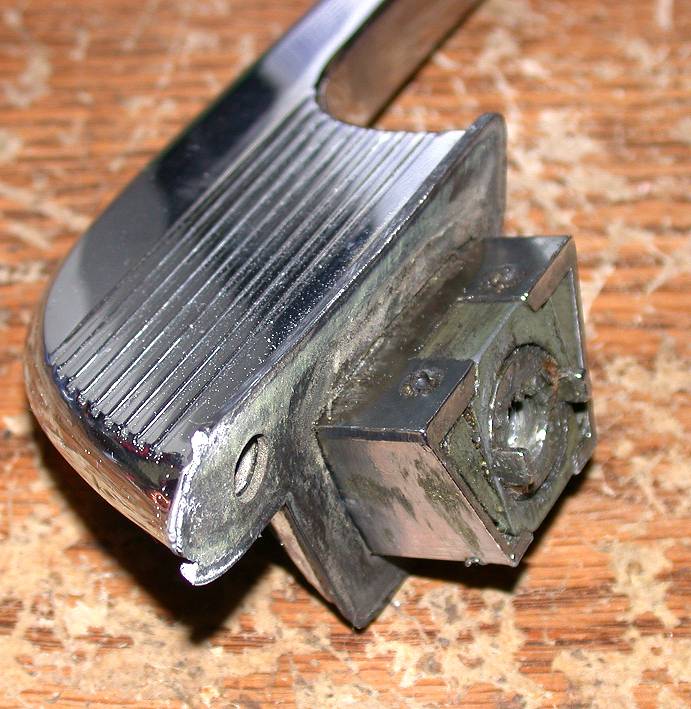
The photo below shows the lock cylinder lever as it sits inside the latch's lock/unlock control lever. The lock cylinder's lever pushes up on the top of the "c" channel to unlock the door, or down to lock.
(Click on a pic
for a much closer look.)
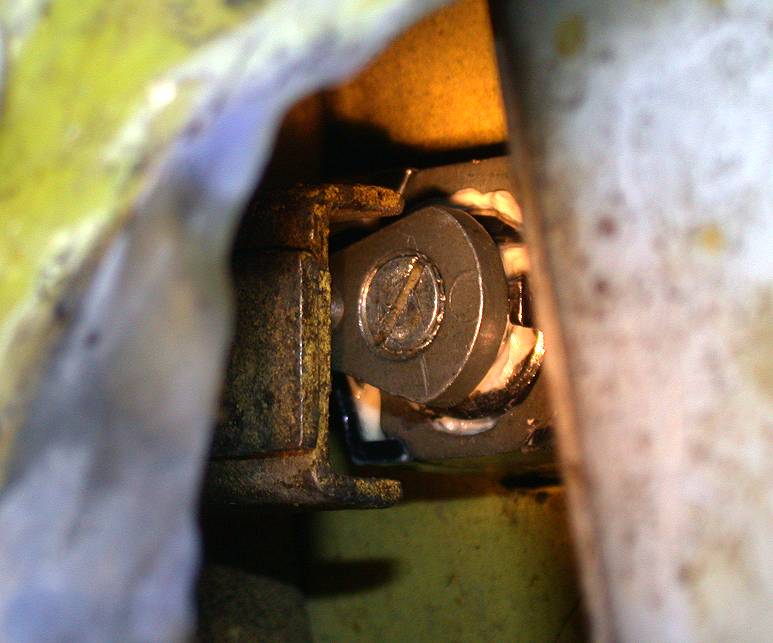
The photo below clearly shows the lock cylinder lever:
The "sticky lock" problem arises when the "c" channel of the latch mechanism moves too far away from the trailing edge of the door (because the pivots have developed play over time), such that the tip of the cylinder lever overshoots the "c" channel and catches on the edge when trying to lock or unlock. Since this is an issue of mechanical interference, no lube will help - the mechanism will have to be put back into alignment.
To do this, you must remove the latch mechanism from the door and put an "s-bend" into the lever like this:
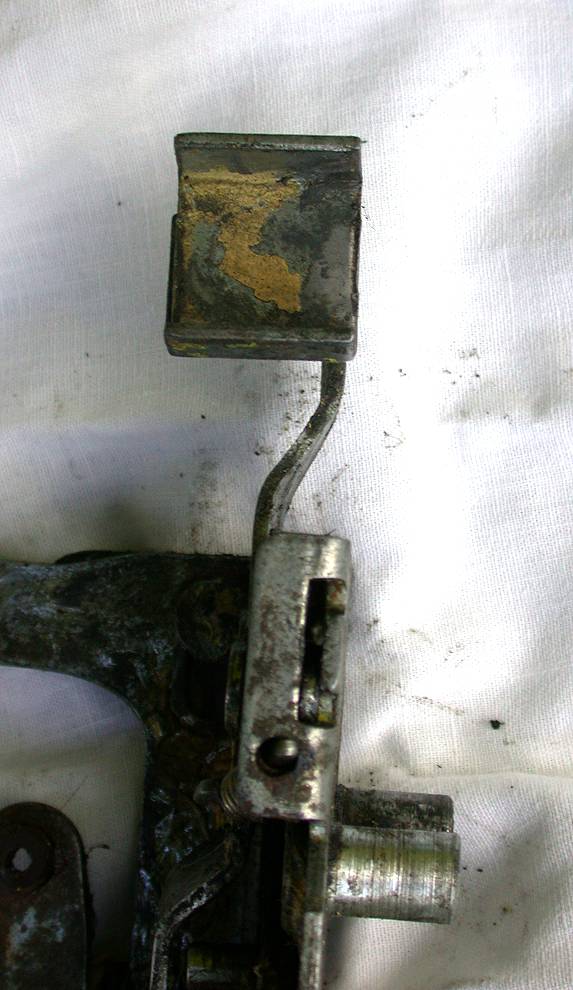
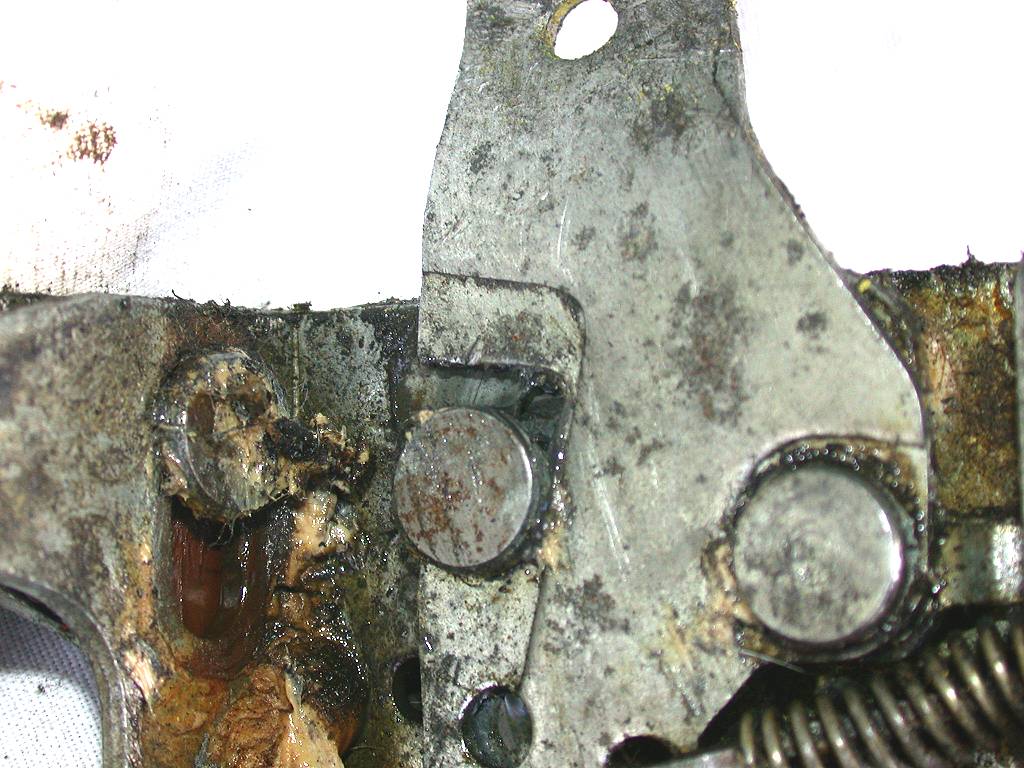
This must be done carefully. Too much "s" and the lever will rub and stick against the door edge. Also, if you distort the part of the lever where it pivots and slides against the body of the latch, it will cause another binding problem. Note how the lever must clear this rivet head when it is in the "locked" position (here shown in "unlocked" position):
And that is it! Clean all parts, lube well with suitable grease (white lithium spray grease is generally recommended for such use) and reassemble carefully. I like to put a drop of blue loctite on the door latch screws in addition to tightening well - it protects the threads from corrosion in addition to preventing them coming loose. Check to make sure that the tip of the lock cylinder lever never goes over the edge of the latch lever "c" channel, and you are done. Also, take this opportunity to replace any missing or deteriorated bushings for the linkage rods - a missing bushing can cause a heck of an annoying rattle and buzz in the door!
I should note that this article and most of my broken lock experience is based on '74 and older '02s. I have noticed, however, that later-production latch mechanisms have the "c"-channel welded on with a considerable offset toward the door edge as compared to the earlier latches. It would seem that someone at BMW had noticed the same problem sometime in the mid '70s.
Replacing, Re-Keying and Lubing the Lock Cylinder
For those of us unfortunate enough to have the door lock cylinder break, there is still hope of effecting repair without involving a locksmith or replacing all three locks just to have them match.
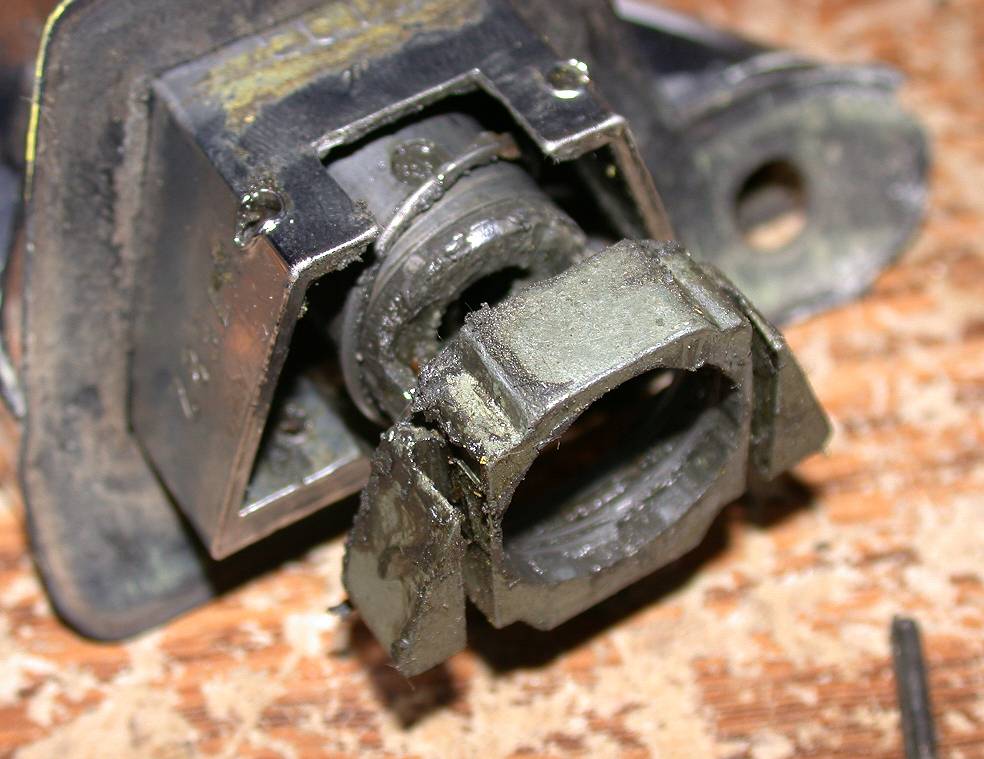
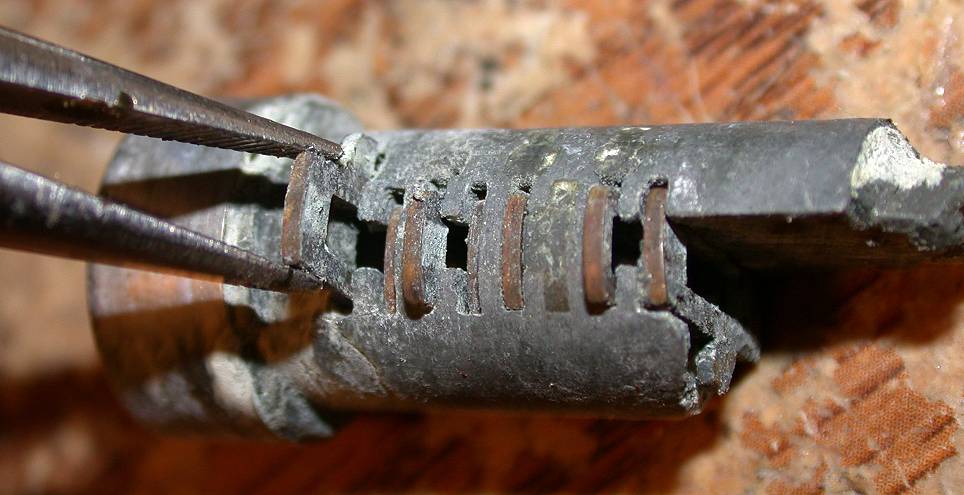
The photo below shows what happens to the lock cylinder if you keep forcing the sticky lock:
Note how the lever is gone! Fortunately, the cylinder remained behind so I could reuse the tumblers. Sometimes, the cylinder just falls out on the road and disappears forever...
To get the door handle lock apart, push out the two roll pins that hold the button mechanism in place (this step is not absolutely required when re-keying, but it is good to do when you also want to clean everything and re-lube.):

The button will then pop out the back:
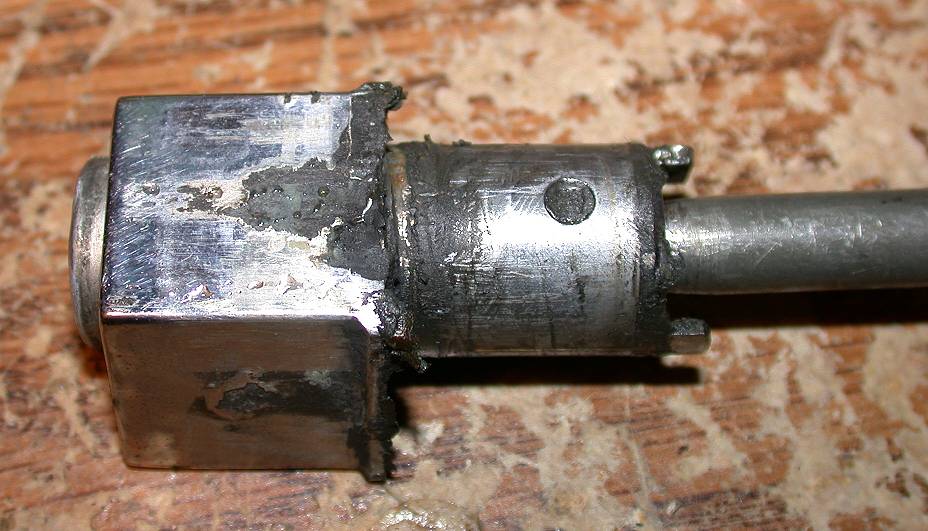
Here is my good replacement button and cylinder and an example of how a normal one looks when removed:

To get the cylinder out of the button, remove the lever (if still there) and then push the cylinder out through the front of the button with a suitable drift (#2 Robertson screwdriver, in this case):
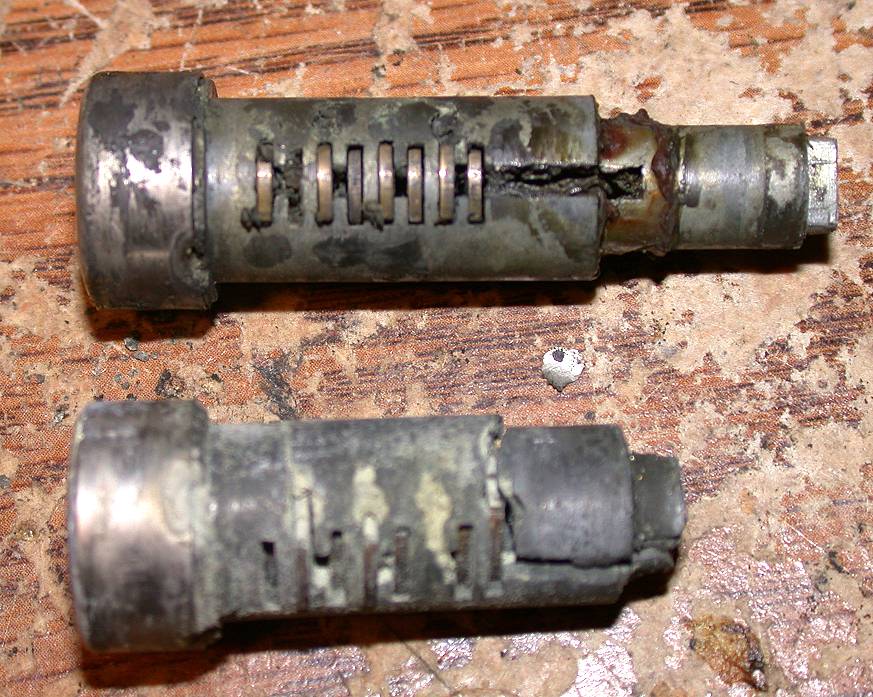
Here is the broken cylinder compared to one in good condition. Notice the corroded and weakened pot metal of the broken one... another good reason to keep them well-lubed.
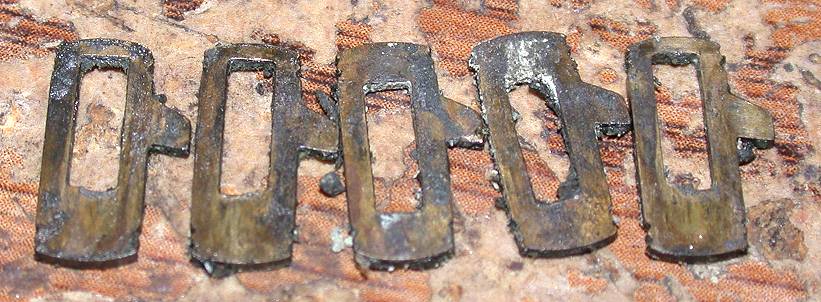
Now comes the fiddly part - removing and replacing the tumblers from the old to the "new" cylinder so that your original key will work. Do this carefully on a clean and spacious workbench, and lay out the parts in order. Should you mix them up, do not despair but plan for an extra hour of fiddling until you get them right. The tumblers are often gummed-up and need to be pushed out from the opposite side before you can grab the end with pliers to pull them all the way out. There is a total of eight tumblers, four going in from the top and four from the bottom. Be careful with your "new" cylinder - the thin sections between slots are easily damaged if blunt/tapered objects are used to push out the tumblers (i.e., big screwdrivers).
The tumblers are small brass plates with varying slot positions, they ride in the slots in the tumbler and are spring-loaded to pop out of the cylinder unless the correct key is inserted. The protruding ends of the tumblers catch in a matching slot in the lock button, preventing the cylinder from rotating.
Normally the springs stay in the cylinder, but do be ready to catch them. Use spares from the dead cylinder if any get away. To insert the tumblers into the new cylinder, make sure the tumbler is going in perfectly straight, otherwise, the little tab that contacts the spring will catch and seem like it is too wide to fit.
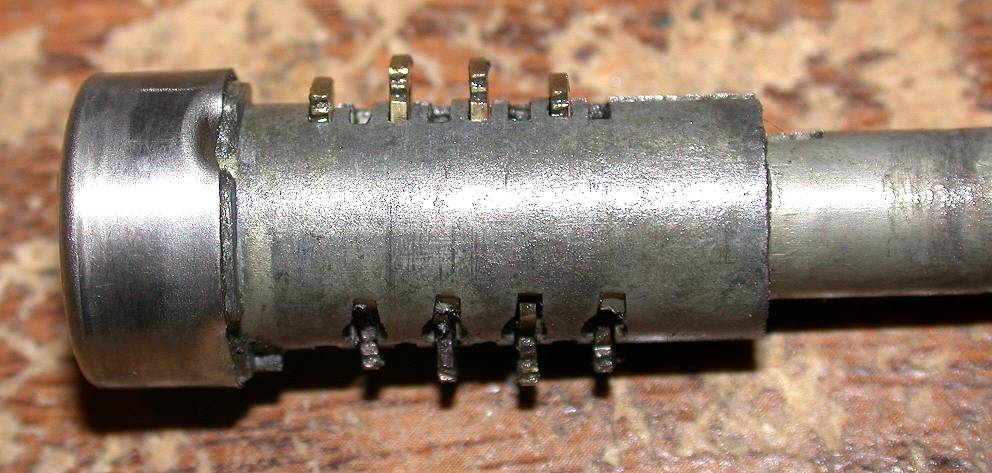
When installed into the new cylinder, the tumblers will look something like this:
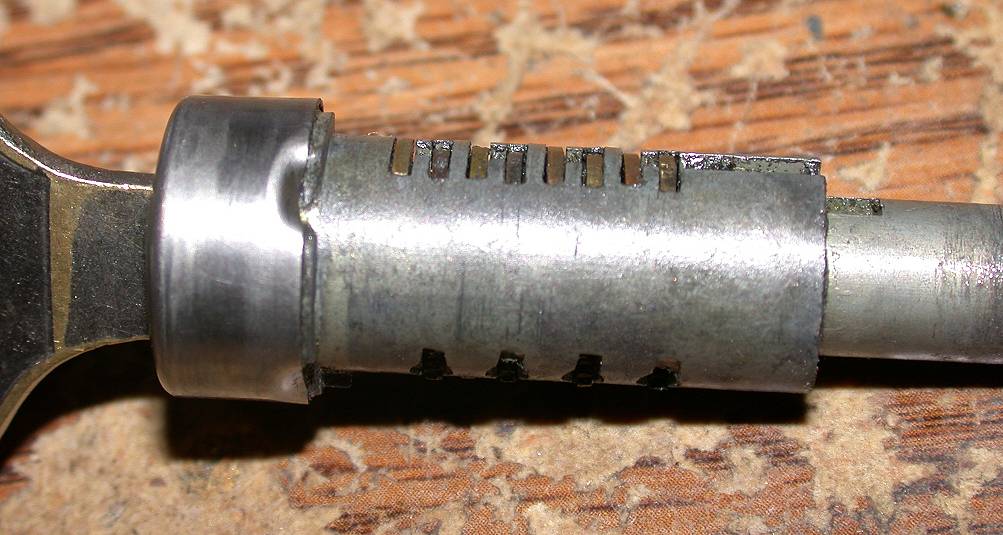
When the lock is correctly keyed and the key is inserted, they become perfectly flush with the body of the cylinder:
Perhaps because the old lock's tumblers were quite worn, I found that I had to mix and match some tumblers from my selection of broken locks to get the new one perfect, but I am fussy like that. You don't absolutely need to have all eight tumblers in place but it is a good goal to shoot for. Leaving out tumblers or filing them down will make the lock more likely to work with an incorrect key.
Test the cylinder in the lock button to make sure it rotates freely with the key, but make sure you put the cylinder back into the button right side up or it won't turn at all.
Assembly is the reverse of disassembly but do apply plenty of lubrication and note the fitting of the centering spring at the back of the lock:
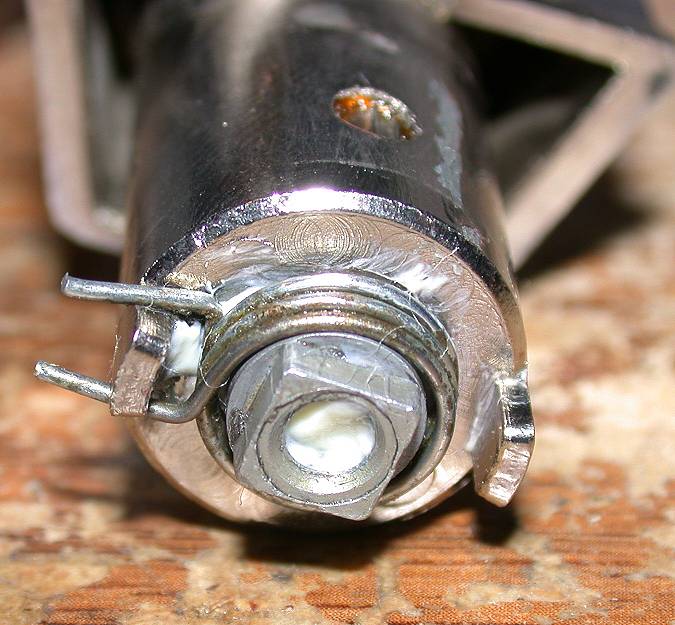
The purpose of this spring is to put the keyhole back to vertical after you lock or unlock the car. It is easy to get wrong. This pic shows the driver's side orientation, it is reversed for the passenger side. The spring is under slight tension when you place the ends on the opposite side of the tab on the lock button. The tab on the back of the lock cylinder lever must sit between the ends of the spring when installed, as well. I use a bit of blue (medium) loctite on the lever screw, in addition to the original lock washer.
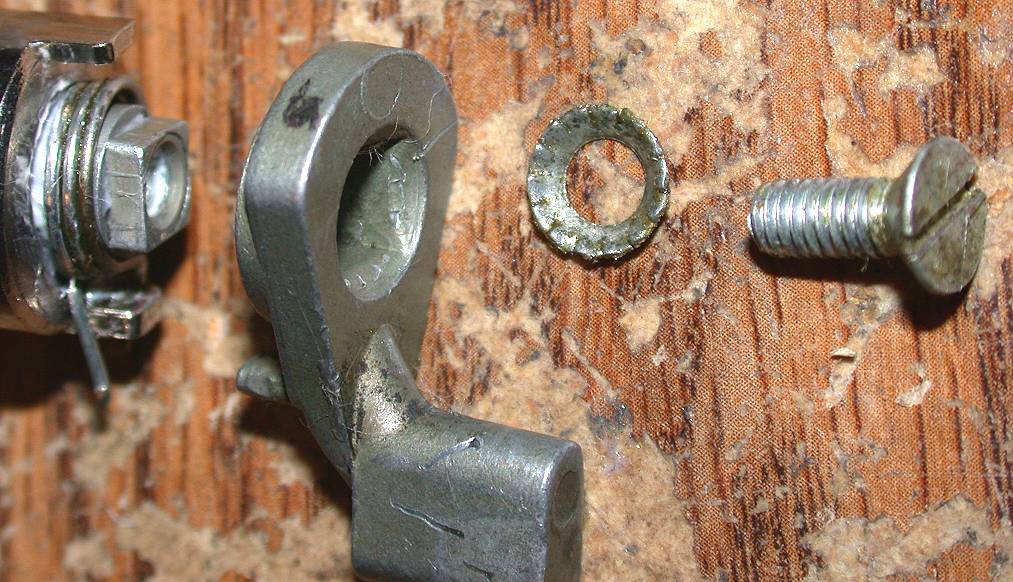
Here is another view of all the parts in order of assembly:
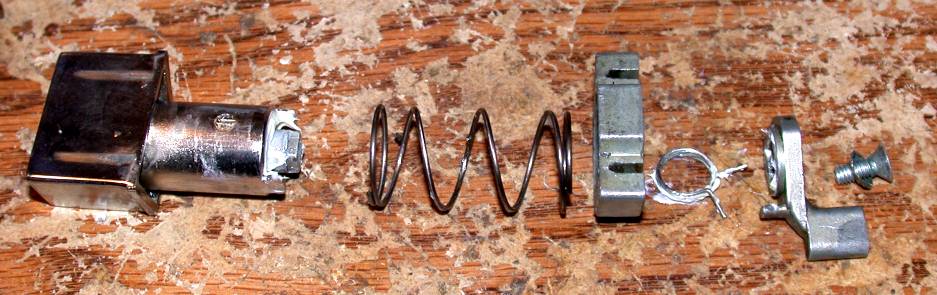
To make things slightly easier, you can place the lock button with cylinder into the door handle, followed by the spring, retainer and pins, before attaching the centering spring, lever and securing screw.
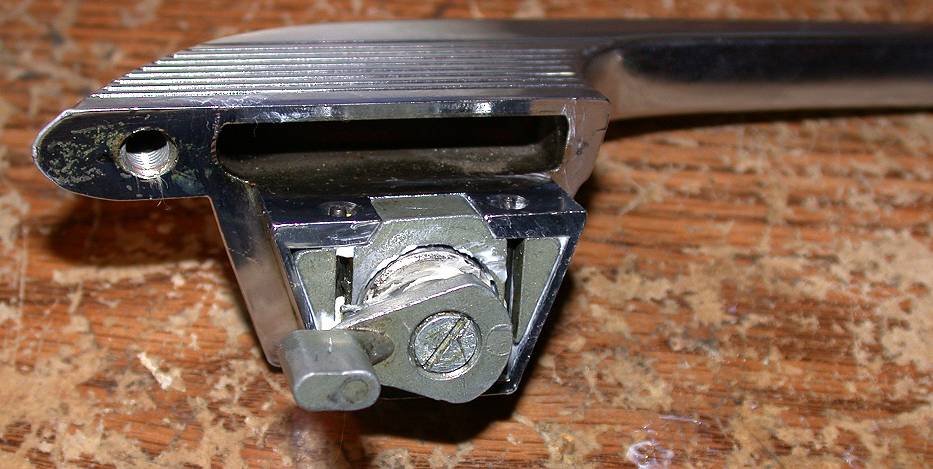
The completed door handle with lock looks like this (drivers side):
Note how the lever always points to the rear of the car and is horizontal.
Install the handle back into the door making sure the engagement of the lock lever and the latch lever are as described above and your lock will be as smooth as new. It is amazing how much more enjoyable it is to use the car when you have fully-functional, easy-to-operate door locks!


